Quick Start Guide
A timeline is a collection of events (moments, memories, chapters of a life) that you can view in a few different ways and share with family. This page walks through the basics. Nothing here can be broken by clicking around, so feel free to explore.
1. Creating a timeline
From your dashboard, click + New timeline. TLCp asks what the timeline is about:
- My life story, Someone else's life or A trip or holiday: TLCp suggests a name, which you can change, and opens your new timeline with some Starter ideasabove it, such as “Born” or “Started primary school”. Press + Add on any idea, give it a date and say a little about it. Nothing appears on your timeline until you add it. Not for me hides an idea, and Hide starter ideas hides them all. You can bring them back with Show starter ideas again under Timeline settings.
- Something else: start blank: an empty timeline, built by hand one event at a time (below).
- From my photos with qChat: a first draft built for you from a batch of photos (see section 4).

When you start a blank timeline, you'll fill in:
- Timeline name and an optional description.
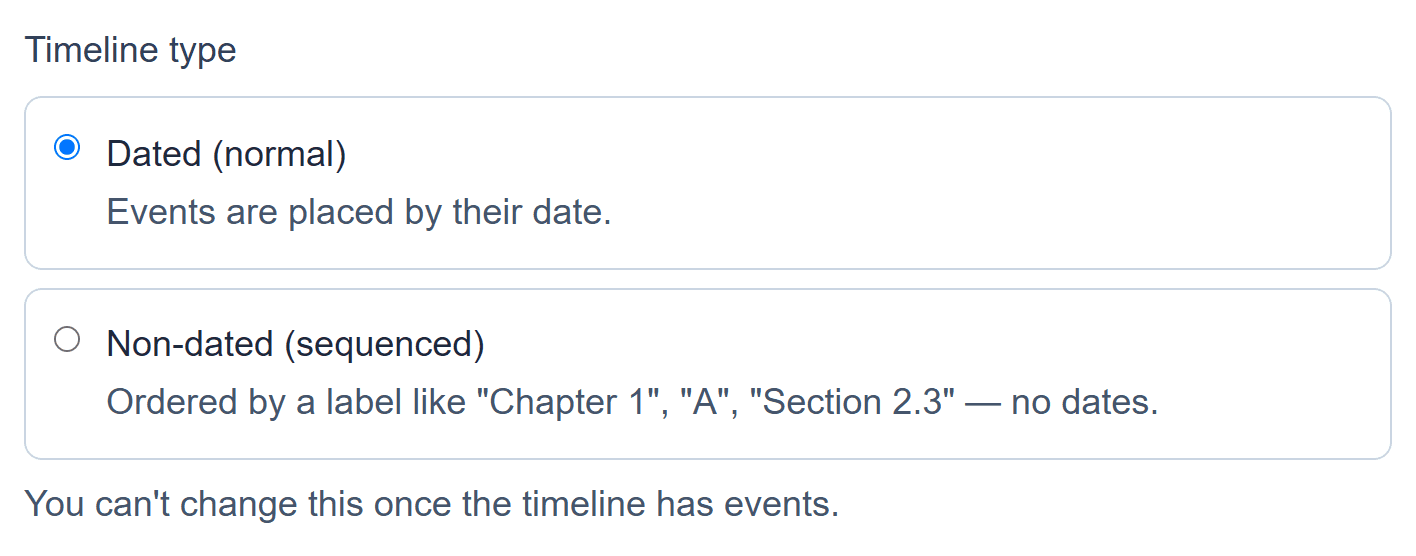
- Timeline type: "Dated (normal)" if events have real dates, or "Non-dated (sequenced)" if you just want them in an order (like chapters), with no dates required. This is fixed once the timeline has events, so choose it before you add any.
- Show dates as: full date & time, just the date, month & year, year only, or hidden entirely. Pick Month & year when you know the month but not the day, so the timeline doesn't have to invent one.
- Optional keywords, to help you find it later with search.
- An optional banner image. Once you've picked one, you can click and drag the photo to choose which part shows.
When all is set, click Create timeline at the bottom. Your new timeline opens straight away, ready for its first event.
2. Adding events
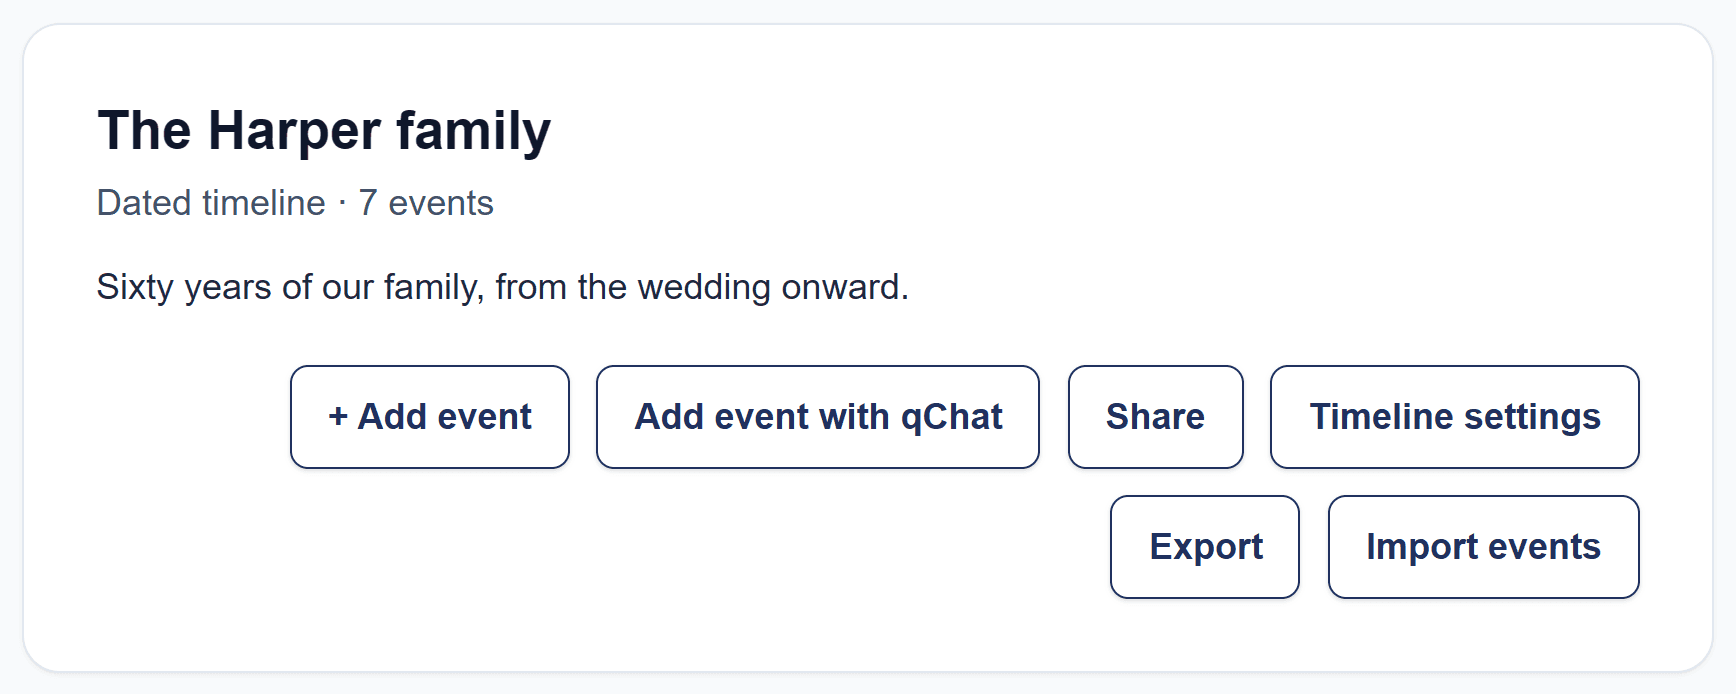
To add an event, open the timeline and click + Add event. You'll fill in:
- Title of the event.
- Description. This is where you write the details of the event. Here you can format your text and insert an image (see section 3) at the beginning, at the end, or in between paragraphs.
- Start Date and an optional End Date.
- The Show date as option lets you select if you want to show the Full date and time (if known), just the Date, Month & year (when you know the month but not the day), Year only (if the exact date is not known), or make the date Hidden. Leave it on Use timeline default to follow whatever the timeline itself is set to.
- Photos go inside the description, using the Insert Image button (see section 3).
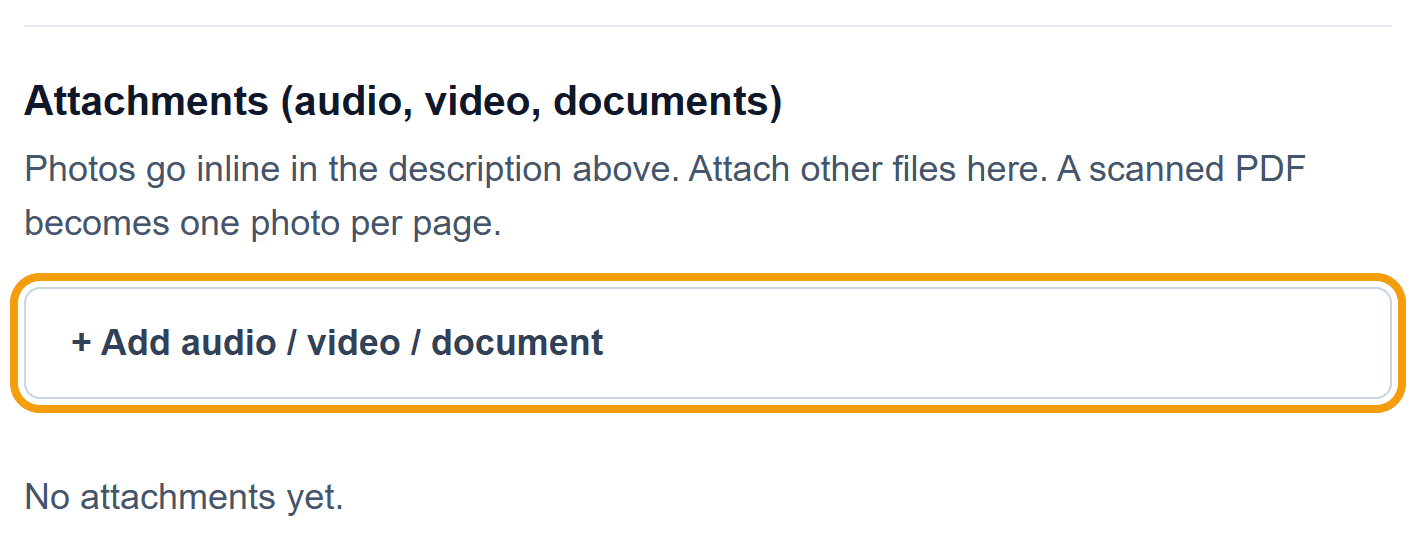
- Attachments. Below the description, the + Add audio / video / document button adds sound recordings, videos and PDF documents, up to 50MB each. Sound and video are shown at the bottom of the event.
- Scanned documents. If you scan a letter or a certificate, your scanner most likely saves it as a PDF. Add it with that same + Add audio / video / document button. TLCp turns each page into a photograph automatically, so the pages appear in the event and can be read in place, in the right order, with nothing to download or open separately.
- Event color (optional) tints the event's card, so a group of related events stands apart from the rest.
- For a non-dated, sequenced timeline, you'll give it a Label (like "Chapter 1" or "Section 1") and a Place in sequence number.
Click Add event to save.
3. Inserting an image
In the Description box when adding an event, you'll find the Insert Image button in the toolbar, along with formatting buttons such as Bold, Heading, Bulleted list and Link. First click in your text where you want the image to go: at the beginning, at the end, or between paragraphs.
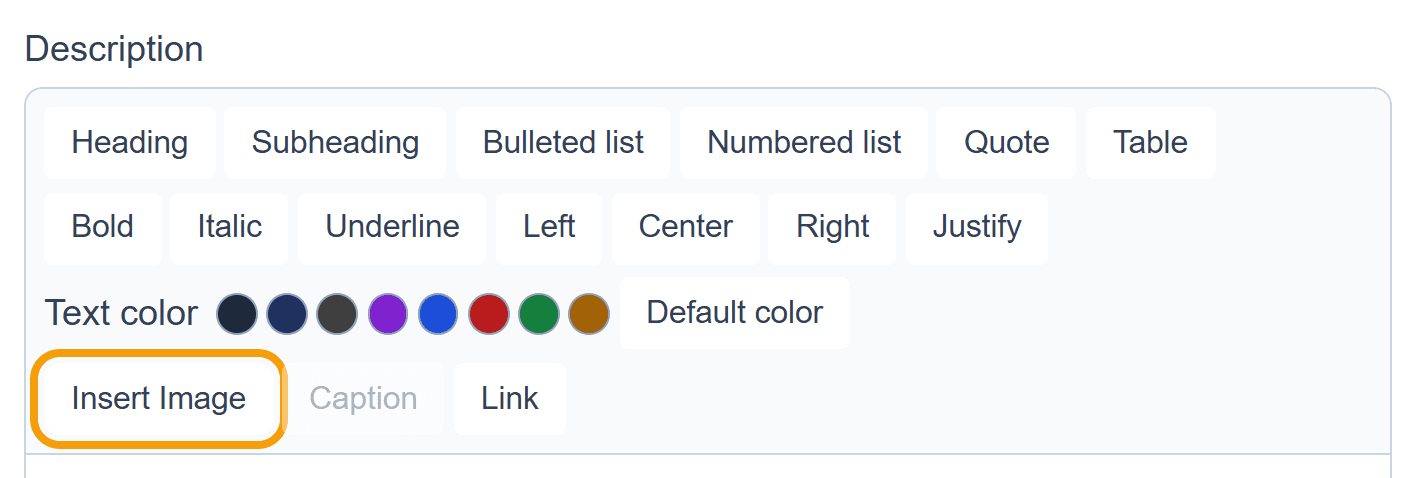
- Click the Insert Image button.
- In the window that opens, find and select the image, then click Open. Images go in one at a time, so repeat this for each photo.
- An optional Caption window will open. Leave it blank for no caption, then click OK.
- To add or edit a caption after inserting the image, click the image and then click Caption in the toolbar. Add or edit the caption, then click OK.
- Click Add event or Save changes.
4. Using qChat to build a timeline from photos
qChat is TLCp's built-in AI (artificial intelligence) feature. Think of it as a helpful assistant that looks at your photos for you. Give it a batch of photos and it writes a suggested title and description for each one, the way a friend might describe your photos back to you. It is told to describe only what it can actually see in the photo (plus, when a photo carries them, hidden details like when or roughly where it was taken) and not to invent names, dates or places. Like any AI it can still get something wrong, which is why you check every word before it is saved. There are two ways to use it:
- From my photos with qChat, after + New timeline on the dashboard, starts a brand new timeline in five easy steps: name it, choose a banner, add up to 20 photos, choose a caption style (point of view, tone, and length), then review. On the review screen each item has a Change button so you can adjust anything before generating.
- Add event with qChat on an existing timeline is a quicker one-screen version: choose up to 20 photos (one event is made from each) and a caption style, then press Generate.
Either way, qChat only creates a draft. You'll see every suggested caption on a review screen, where you can edit or remove anything. Nothing is saved until you press Save.
5. Ways to view a timeline
Every timeline can be viewed three ways, using the tabs at the top: Horizontal, Vertical and Carousel. Switching is instant; nothing reloads and you never lose your place. On a phone, timelines always open in Vertical (the easiest to scroll with a finger); on a computer, it remembers whichever view you used last.
- Vertical: a simple scrolling list, with a search box to find an event by keyword and, on a dated timeline, an Oldest first / Newest first choice.
- Horizontal: a left-to-right timeline with First / Previous / Next / Last buttons, zoom in and out (the + and − buttons), and a Fit button to see every event at once. On a dated timeline, a row of Show buttons (such as Day, Week, Month, Year and Decade) jumps to that much time. Only the spans that suit the timeline are offered, and an Hour button can appear when several events have a time of day. On a phone, you'll see a tip suggesting you turn the phone sideways for a wider view. It's just a suggestion and easy to dismiss.
- Carousel: one event at a time, with arrows (or Previous/Next buttons on a phone) and a counter like "3 / 12" so you always know where you are.
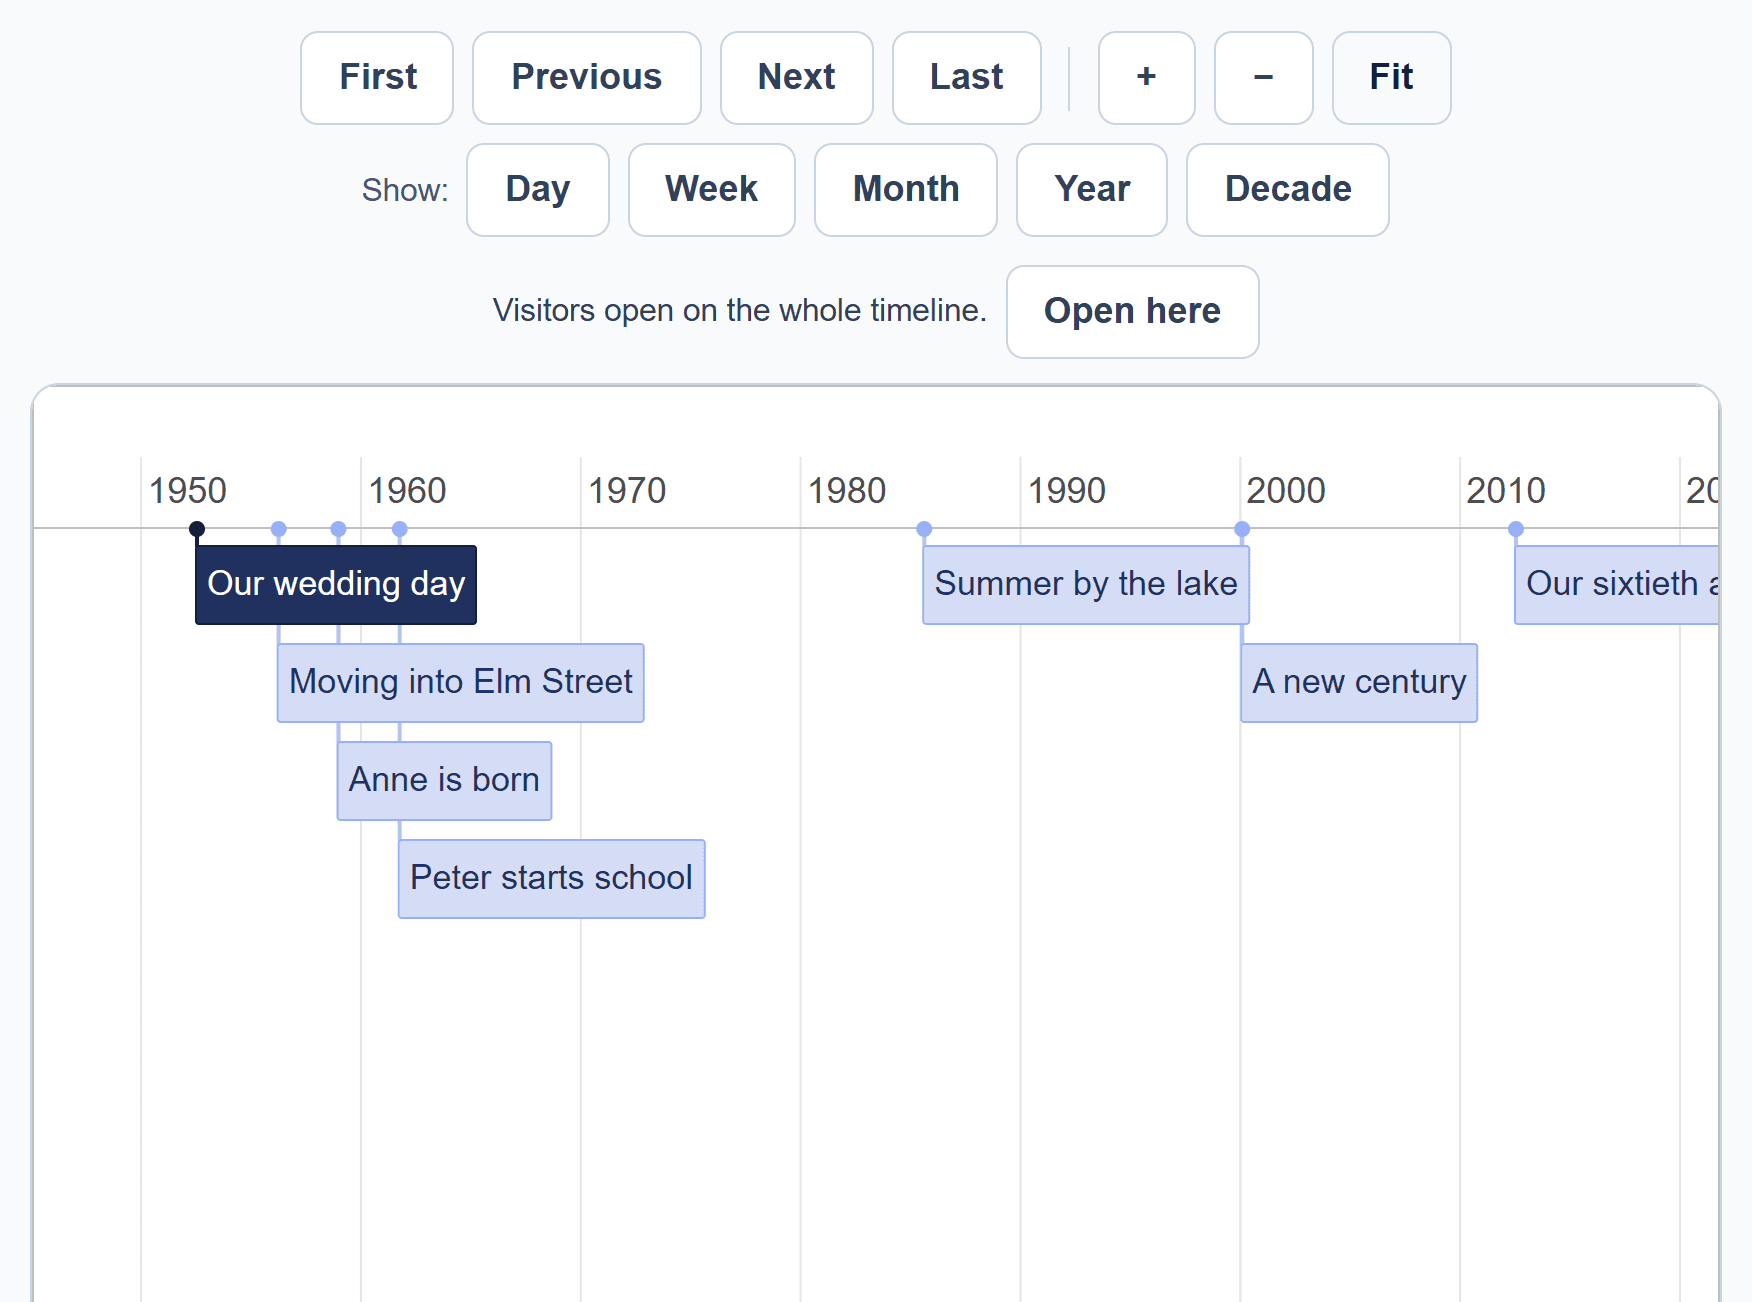
If a dated timeline is yours, you can also choose what people see first in Horizontal view. Zoom and move to the part you want, then press Open here. Reset goes back to showing the whole timeline.
6. Changing and deleting
- To change an event, press the Edit button on it, in any of the three views. Make your changes and press Save changes. If you try to leave with changes you have not saved, you will be asked whether you really want to.
- To move an event, change its date. Events always sit in date order. On a non-dated timeline, change its Place in sequence number instead.
- To change a timeline (its name, description, keywords, how dates are shown, or its banner), open it and press Timeline settings.
- To delete an event, press Edit on it, then Delete, and confirm with Delete event.
- To delete a whole timeline, open Timeline settings, press Delete beside "Delete this timeline" at the bottom, and confirm with Delete timeline. This removes the timeline and every event in it.
Both kinds of delete ask you to confirm first, and neither can be undone, so take a moment before pressing the red button.
7. Sharing a timeline with family
Open a timeline and click Share. There are two ways to share it:
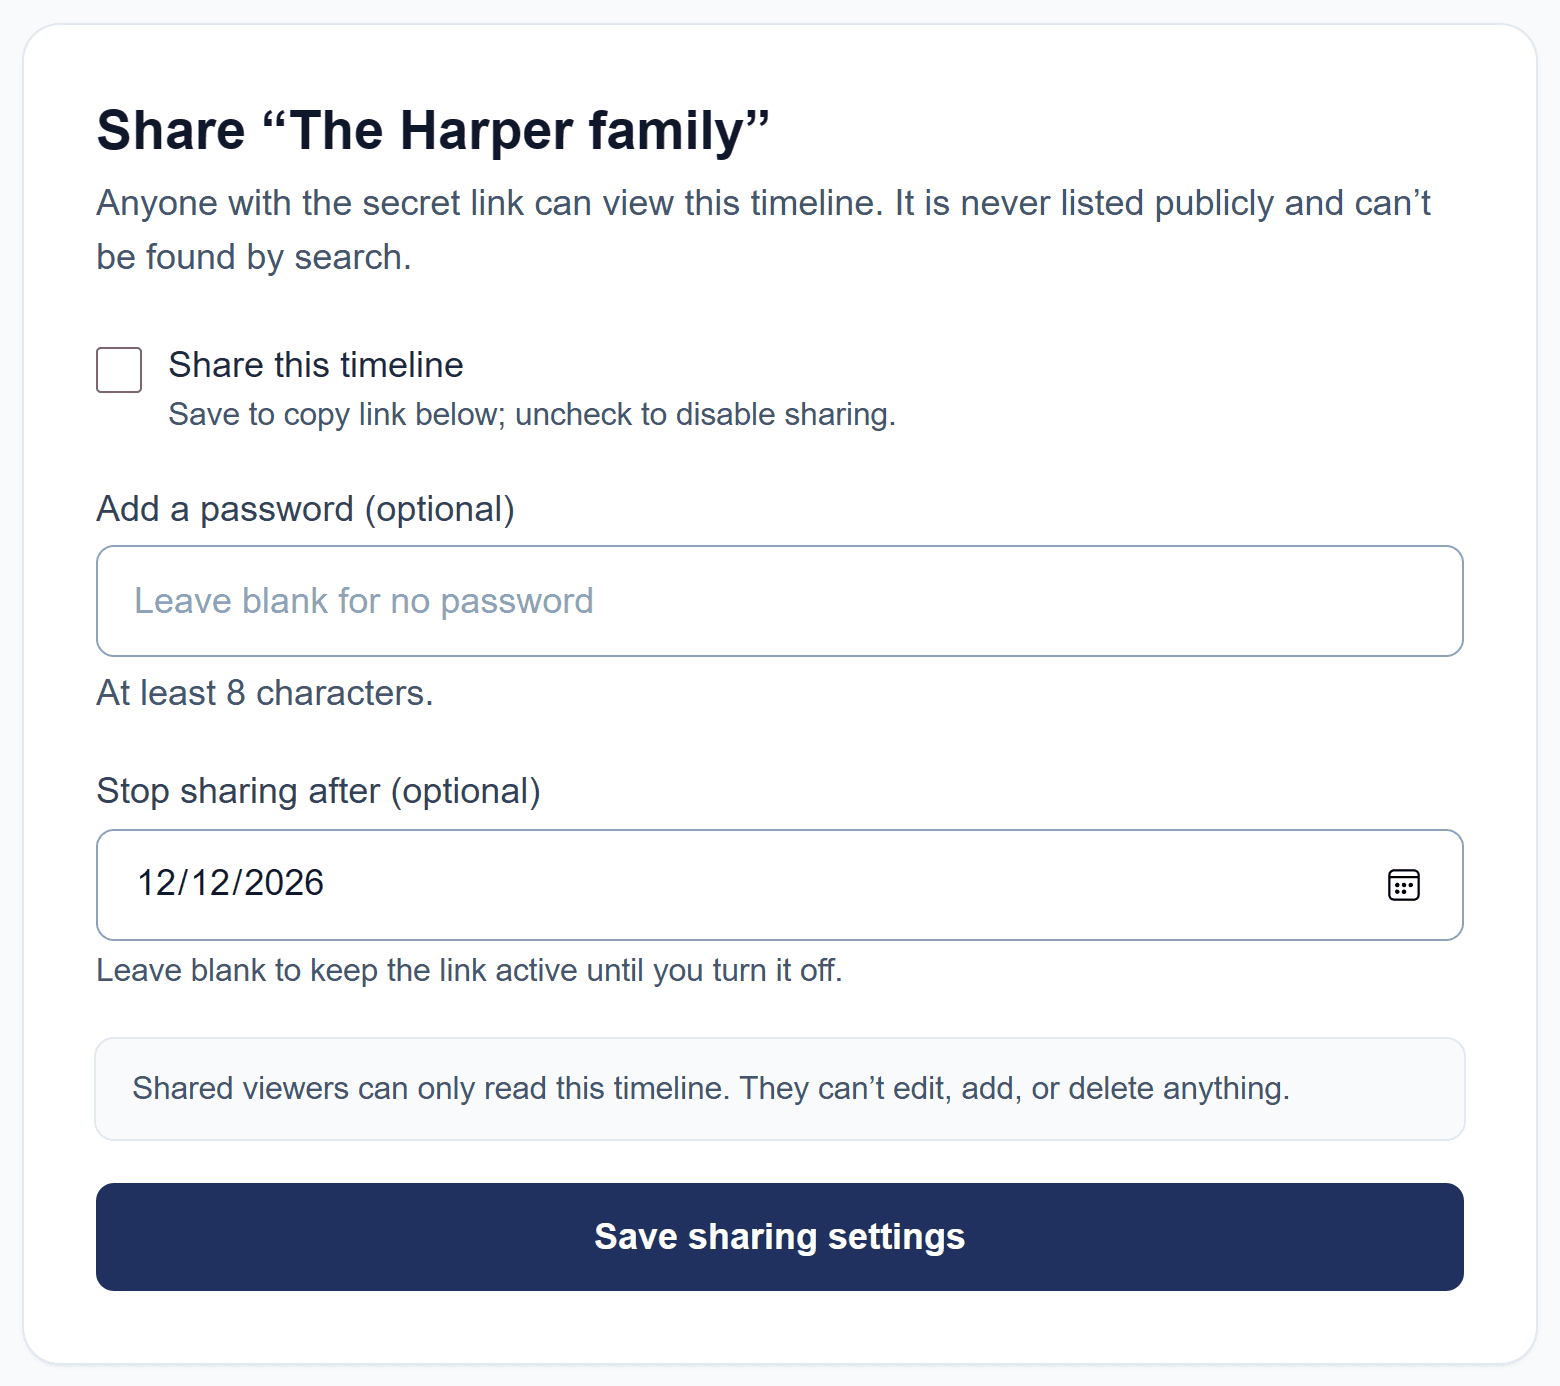
- A secret link: tick "Share this timeline", then optionally tick "Share only selected events" to choose exactly which events show (with Select all / Select none to help). That choice applies to everyone you share with, including people you invite by email. You can also add a password or a "stop sharing after" date. Click Save sharing settings to get a link with a Copy link button. If you ever want the old link to stop working, use "Replace the link".
- Invite by email: give one specific family member ongoing access. Type their email address and press Invite. When they sign in to TLCp with that address (or create an account with it), they see your invitation at the top of their dashboard and press Accept. Until then it is listed on your Share page as waiting, and you can press Withdraw to cancel it.
To view a timeline someone else has shared with you, look for the Shared with me section on your dashboard and click View. If someone opens your secret link, they'll see a clear "read-only" banner: they can look but not change anything. If they're signed in, they can also ask for ongoing access with a "Request continued access" button. Their request appears on your timeline's Share page, where you can Approve or Decline it.
To stop sharing, open the Share page again. Untick "Share this timeline" and press Save sharing settings to turn the link off. People who accepted an invitation are listed under People with access and keep their access even when the link is off, until you press Remove access beside their name.
8. Saving a copy, and importing events
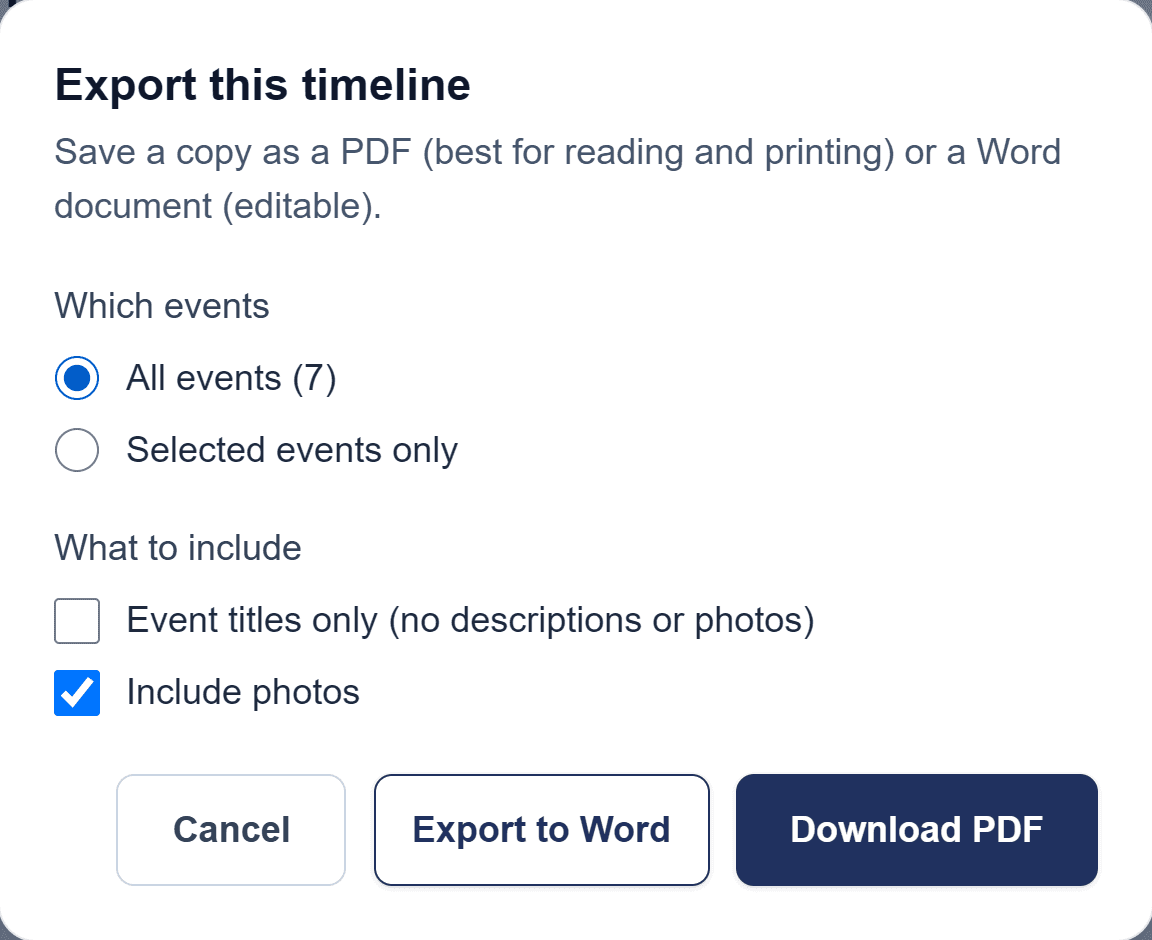
Open a timeline and press Export. Choose all events or only the ones you tick, and whether to include photos (or just the event titles). Then press:
- Download PDF for a copy that is best for reading and printing, or
- Export to Word for a copy you can edit.
On a dated timeline you can also bring in many events at once from a spreadsheet. Press Import events, then Download the template (.csv), and fill in one row per event. Write dates as YYYY-MM-DD (for example 2026-06-24), or add a time as YYYY-MM-DDTHH:MM on a 24 hour clock. Save the file as CSV, press Choose CSV file, then Import. If anything in the file is wrong, nothing is imported and you are told which rows to fix.
9. Signing in and your account
- Opening an account. Choose Create account (Sign up on a smaller screen), fill in the form and wait for the robot check to finish. We then email you a link; open it on any device and you are signed in.
- Forgotten your password? On the sign-in page, press Forgot password? and we will email you a link to set a new one. Each link works once, so if one fails, simply ask for another.
- Coming from the old TLCp? Your timelines are all here. Use Forgot password? once to set a new password, because passwords were not carried over.
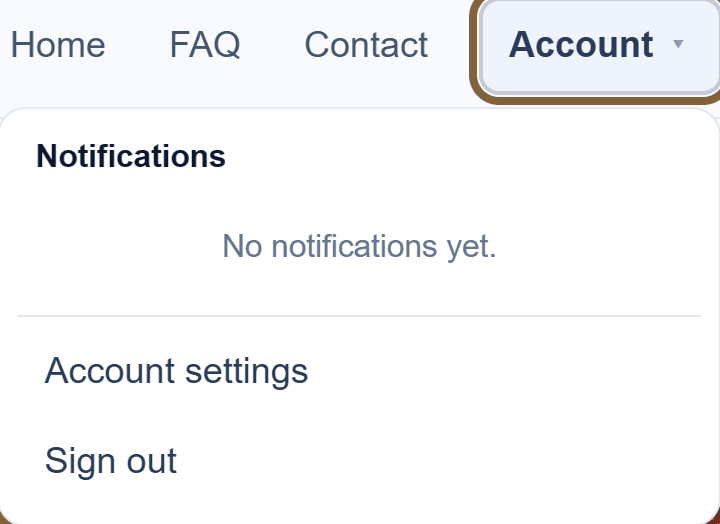
- Changing your name or password. Press Account at the top of the page, then Account settings. To change your password you will be asked for your current one. Sign out is in the same menu.
- Changing your email address, or closing your account. These are not on the website yet. Contact us and we will do it for you.
10. Handy things to know
- Deleting a timeline or event always asks you to confirm first, so it's hard to do by accident.
- When someone asks for access to your timeline or shares one with you, a number appears beside Account at the top of the page. Click Account to read your notifications.
- There's a search box on the dashboard to find a timeline by its name or keywords, and another inside each timeline (in Vertical and Carousel views) to find an event.
- On a phone, turning it sideways gives you more room to work with in the Horizontal view.
11. Technical details
What you need
Any current web browser, on a computer, a tablet or a phone. There is nothing to install and no plugin to add. The text is set larger than on most websites, and you can enlarge it further in your browser without the page breaking.
Opening an account
An account needs an email address and a password. Nothing else is required.
What it costs
Nothing at present. If that changes, we will tell you by email before it applies to your account, and you can decide then. An existing account will not start being charged without notice.
Photographs, files and formats
- Photographs can be added in any format your browser can open. Photographs taken on an iPhone, which are HEIC files, are converted for you automatically.
- You do not need to make a photograph smaller before adding it. It is resized for you when you add it.
- Sound, video and PDF files can be added, up to 50 megabytes each.
- Events can be imported into a dated timeline (brought in from a spreadsheet saved as a CSV file).
- A timeline can be exported as a PDF or as a Word document. You can choose the complete timeline or only the events you select, and whether to include the photographs and images.
- Your timelines are private to your account unless you choose to share them.